Creating a Channel
Channel pages allow us to organise the content on the website based on topics, programmes, companies, or similar. They can be branded or unbranded, and filter content in many different ways depending on what you'd like to achieve.
Creating a Channel (Unbranded)
A channel can be created by completing just the Title field for the channel.
There is no need to add a Logo or Channel Directory Thumbnail or complete the Style tab as otherwise this would not be unbranded. Once saved, the channel header will have a grey background and only display the name of the channel.
Likewise, sidebars and leaderboards do not need to be configured as a default sidebar widget will be added once you save the channel. This can be removed if needed to make the content go full width.
If you need to add a few different elements to the channel such as a Logo, or Channel Directory Thumbnail, etc, you can add these and they'll appear as you populate those fields.
When you save a channel and haven't set up any (curated) content a default landing page and tab section will be created. This will show all the latest videos added to the website. If you do not need this, you can remove that section to have a blank starting channel.
You may want to complete the Description field as it's shown to search engines for SEO and also when you share the channel link on social media.
Categorising your Channel
One crucial part to configure for a channel apart from the Title, would be the Channel Category. You can find this by going to the Primary Details tab. Here you need to set the channel category appropriately, there are a few options to choose from.
- Channel - selected by default, but is used for channels that do not fit into the other categories.
- Programme - select this if you'd like the channel to appear grouped with other programme channels (such as on the channel directory).
- Topic - select this if you'd like the channel to appear grouped with other topic channels (such as on the channel directory).
- Company - select this if you'd like the channel to appear grouped with other company channels (such as on the channel directory).
Tagging your Channel
Channels can be tagged so they appear alongside other content when a viewer clicks on a tag to view related content.
This can be set in the Taxonomies tab. There is a Tags field where you can add multiple tags based on what the channel covers.
Setting the Channel Owner
Used for analytics, a channel needs at least one owner. To set this go to the Publishing tab, then the Ownership sub tab.
From here you can search for the name of the channel owner and add multiple if needed.
Setting a different Player
If you need all the views for a channel recorded against a specific Site Player, you can do this by going to the Publishing tab, then the Publishing/Analytics sub tab. From the Video Player field you can start typing the name of the Site Player you'd like to use and then select it when it's shown.
Publishing your Channel
Publishing your channel means viewers will be able to see it, not just admins. You can do this by scrolling to the bottom of the page and ticking the checkbox labelled Published.
Don't forget to save
Don't forget to save your channel frequently, especially after you make any changes. This will avoid any of your work getting lost.
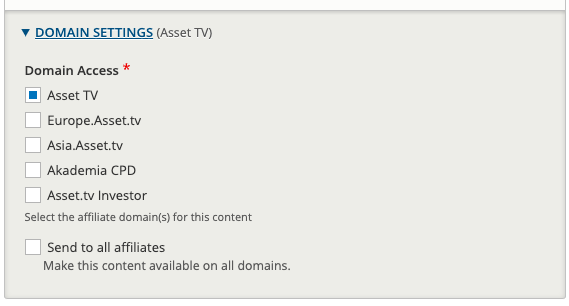
Depending on the regional platform you are on, you may also need to set the domain the channel will be visible on, you can do this by editing the domain settings. If you can't save, if might mean you need to set the domains.
Tip
Setting a domain doesn't apply to South Africa.
Custom Publishing Options
If you need keep your channel published, but would like to hide it from any listings or appearing in a search, you can do this via custom publishing options.
To avoid your channel appearing in any listing, open the Custom Publishing Options box on the right of the page, then tick the checkbox for Private.
If you want your channel to stay out of search results, tick the checkbox labelled Exclude from Search.
Both of these options are independent from one another so you can use them as needed.

Branding a Channel
If you want to create a branded channel, complete all the steps mentioned above and follow the guide for branding a Channel.
Adding Videos to a Channel
To add videos to a channel, create one using the steps above, then follow this guide to add videos to a Channel.