IQ Engage (Sponsored Blog)
The Sponsored Blog is the main blog for our websites. To view it you can click the IQ link on the main menu on any of our sites.
Sponsored Blog has been rebranded as IQ Engage
This means on the frontend you'll be looking for IQ Engage, but in the admin, it'll be labelled as Sponsored Blog.
We use the Sponsored Blog to post: written content, whitepapers, blogs and articles.
What you will see is a list of all the (published) blog posts. This is not the same as adding blog articles or whitepapers to a channel, which can be done using this guide.
Creating a Post
First you need to go to Admin > Content > Add Content > Sponsored Blog.
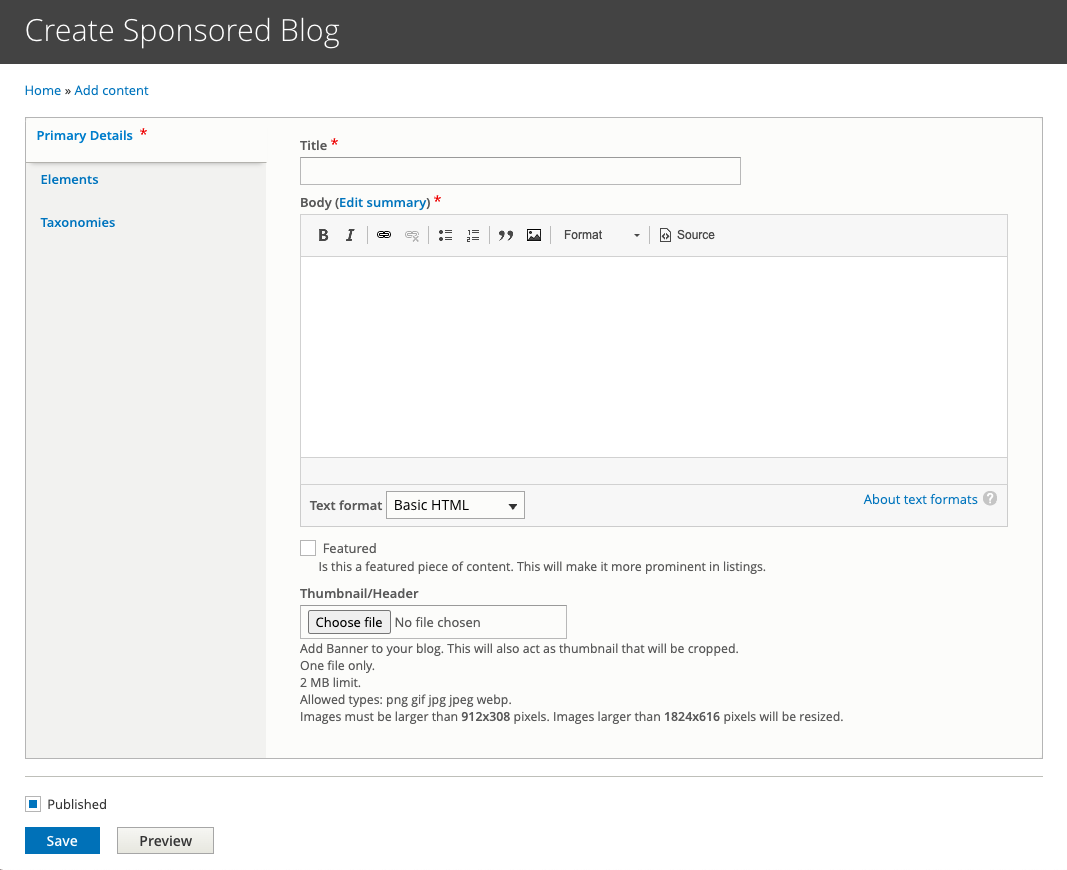
Next you'll need to complete the Title and the Description; both of these are seen by viewers:
- The Title being the title of the post and,
- The Description being the content of the post.
Description (the Content)
When adding the content of the post to the description field, there is one detail you need to consider. If the content is basic, you can leave the Text format drop down to Basic HTML, but it's recommended you change this to Full HTML so you can add things like subscript, superscript, tables, etc.
Styling tips
Once you've added the content, try and give headings an appropriate h2, h3, h4, etc tag where appropriate. Doing this means it'll looks and reads better.
Try not to use the different headings to make the text appear larger or smaller for aesthetics. This is handled by the website styling.
Also use elements such as bullet points, tables, and block quotes to markup the content for better readability. You'll need to set the text format to Full HTML for these options to show.
Post Summary
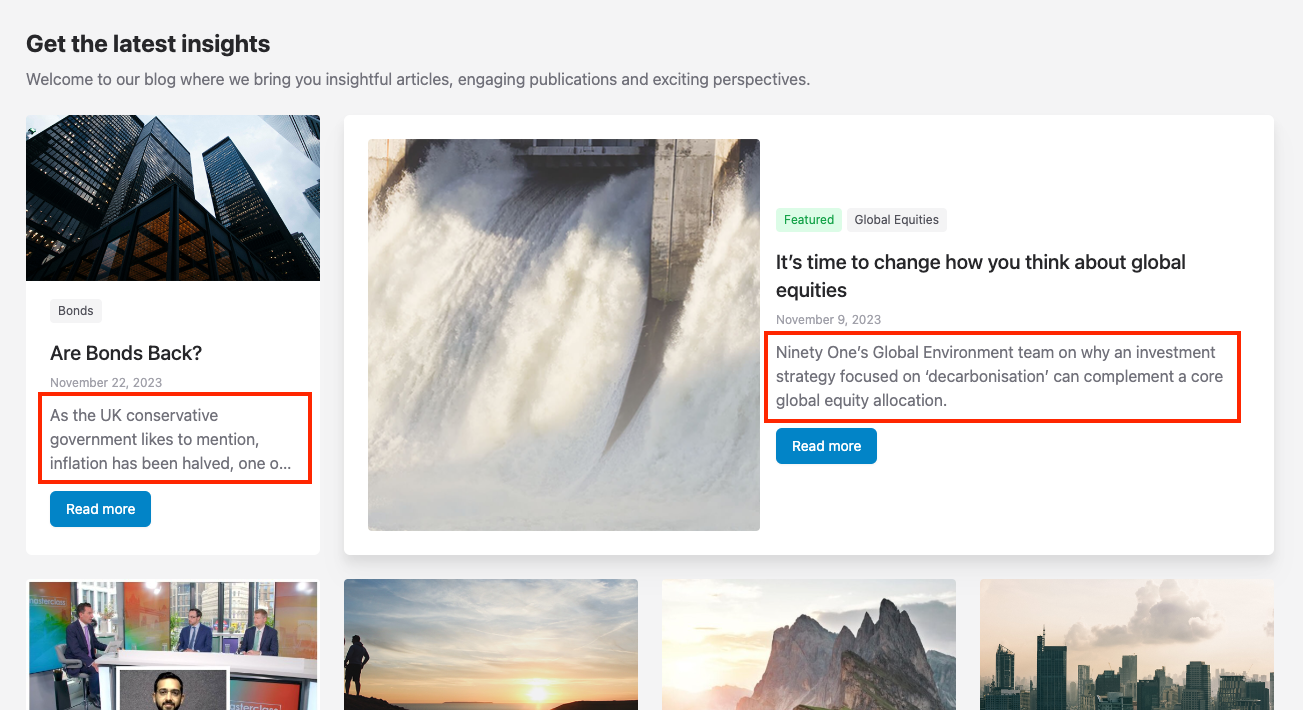
Adding a summary to the post is quite important. If one isn't added the first paragraph will be used instead. If the first paragraph is a title, that's what will show. You will be better off grabbing a paragraph further into the post or writing something yourself where possible.
Once you have the summary content, you can click the Edit summary button next to where it says Body and add the summary in the box that appears.
Post Banner
To keep the Sponsored Blog page looking consistent visually, you'll need to add a banner. The details for this are below. This graphic will automatically get cropped and used for the thumbnail, so avoid adding text if at all possible.
- Size: 1521 x 390px
- Accepted file types: JPG or PNG
- Maximum file size: 512kb
Template name: Blog Banner Template.psd (Click here to grab the template file)
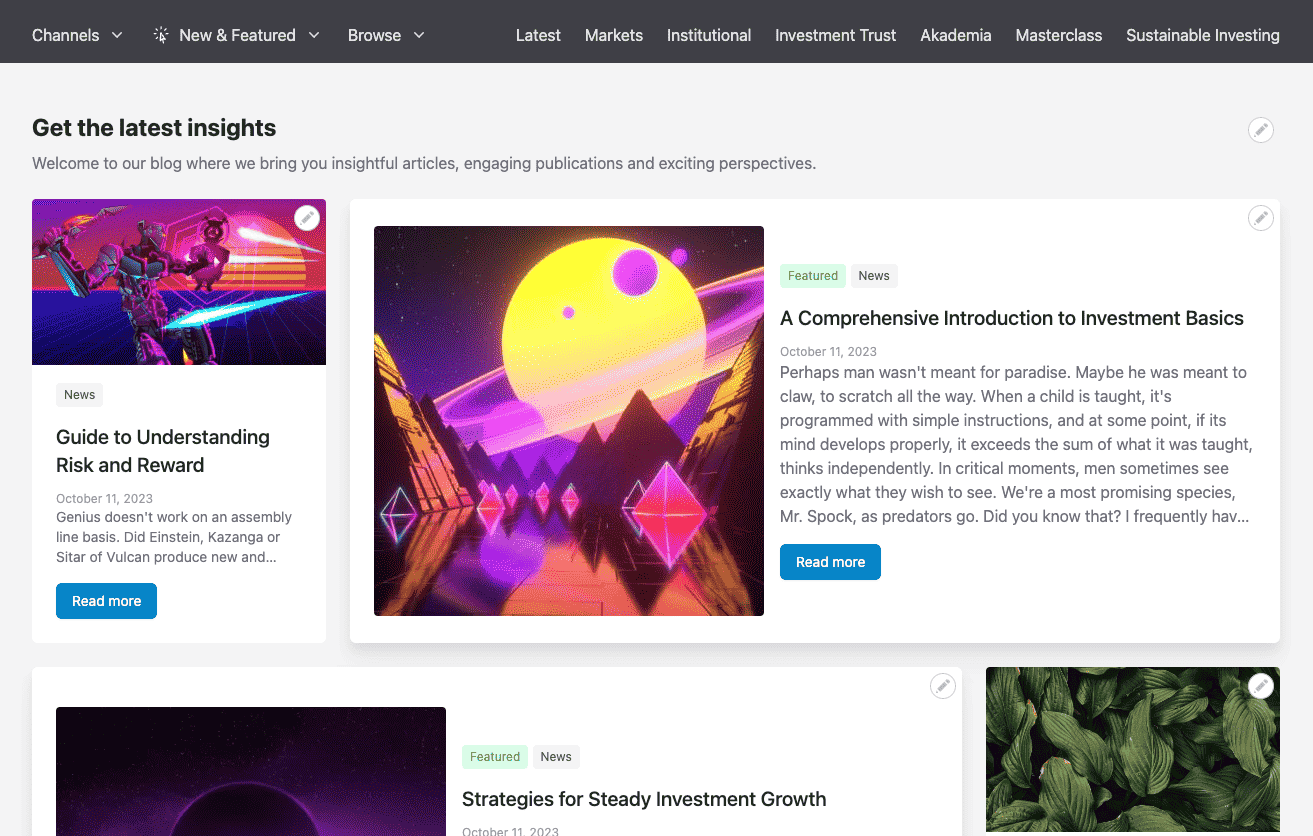
Making the Post Featured
If this is a featured post, you can increase it's size and add tag to make it standout. To do this, when editing the post,tick the checkbox labelled Featured.
Keeping it organised
Due to the differing width sizes of normal posts (one column) and featured posts (three columns), you might need to adjust the order to keep the rows complete. A row is four columns wide.
You can do this by going to the re-organisation page (Admin > Content > Sponsored Blog) and dragging the posts into the order you want, then Saving it.
Do note that any new posts created will appear at the end of this list.
Partner Content Label
If you'd like to mark content as Partner Content on the landing page, when you edit the post, tick the checkbox labelled: Partner Content.
Adding Sidebar Widgets
You can add any normal widget to the sidebar. Each sidebar is configured on a post by post basis. To add a sidebar widget follow this guide on managing sidebars.
Full width content
If you do not set anything in the sidebar, the post content will go full width and fill the content area.
Styling tips
To make the post look better it's best to add at least one or two widgets in the sidebar. This can include the sponsors logo, a list of their videos, some MPUs.
If you need their logo in a format that looks great already, you can grab the Channel Directory image for any sponsor that has a channel on our site. If one doesn't exist you can grab the channel template and generate one.
Adding the widgets mean the content area is narrower. This aids in the overall aesthetics for the post and makes the content easier to read.
Partner Content Widget
There is one special widget designed specifically for the Sponsored Blog and that is the Partner Content widget. This widget lists any other posts that share the same Partner(s). These are managed in taxonomies tab, more information can be found in the section below labelled 'Adding Taxonomies'.
Linking to a Channel
UK Only
Some clients are providing a blog post rather than a video when sponsoring a channel or a hub. They wanted these posts to appear on those sponsored channels. To achieve this, add a channel to the post when editing or creating it (whilst creating/editing, go to the Channel tab and select the channel the post should appear on).
Once this is done, the post will appear with the other videos on the channel.
Adding a quiz
US Only
Blog Posts can have a quiz attached making them eligible for accreditation. This works in the same way as attaching a quiz to a video record.
Important! the only difference between adding a quiz to an blog post vs a video record is that you need to select an additional rule to give the user 50 minutes as articles don't automatically give the user a duration watched as they would for a video.
You can follow this guide to add a quiz to a blog post: Adding a quiz to a video record.
Adding Taxonomies
The final part to configure for a Sponsored Blog is the Taxonomies tab. There are a few sections here, the Tags, the Partner(s), and the Authors.
Tags
Tags are the normal tags which are added to other types of content such as Channels and Videos as well. Adding these will make the posts appear in the search results when the tags are searched for or clicked on.
Partners
Partners are companies, and these are what determine the other posts that appear in the 'Partner Content' widget.
Authors
Adding an author shows a little box at the bottom of the page with their details. This includes: a profile picture, their name, job title, and company.
New Author
To add a new author or edit one that's already attached, click Add New Author or Edit. You'll see a form like this:
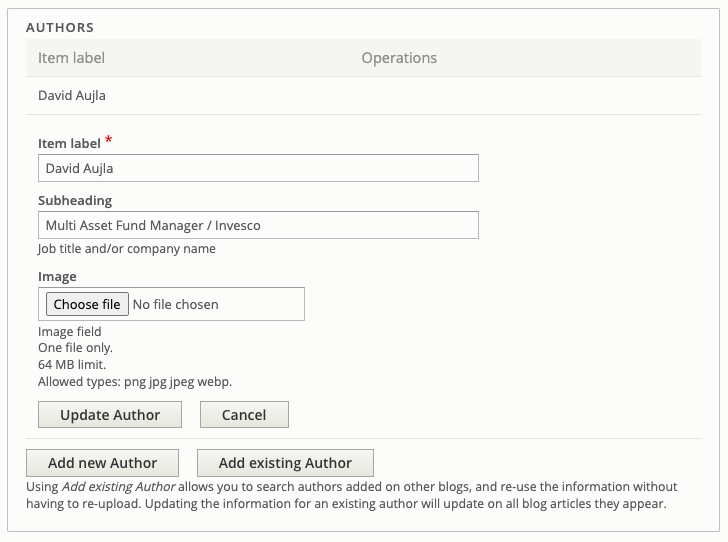
Complete the necessary fields you want to display, we recommend you complete at least the Item Label (Name) and Subheading (Job Title & Company), but adding the Image (Profile picture) will make it look much better.
Finally save the author.
Existing Author
To add author that already exists (this'll be for one that is attached to another blog post), click Add existing Author, start typing their name and select them when they appear in the autocomplete field.
Customising the Read More button
Some clients are asking for blog posts to redirect to their website. To do this, you can replace the URL of the post and add custom HTML to the Read More button.
Here is a chart on how the combination of replacing the URL and adding Custom HTML will work.
| Link used on IQ Engage page |
Link used on Home page widget |
|
|---|---|---|
| Using just the URL replacement | URL Replacement | URL Replacement |
| Using just the Custom HTML | Displays the Custom HTML | Links to the original post |
| Using the URL replacement & Custom HTML |
Displays the Custom HTML | URL Replacement |
To actually do the updates, follow the instructions below.
Replacing the URL
You can do this when you edit a post. It's done by adding a Replacement URL to the post.
Once you're editing a post, scroll to the bottom.
In a box labelled "Read More Button", you can add a Replacement URL. This replaces the link to the post with the URL you've just added. This'll apply to the IQ Engage page and the homepage widget.
Using Custom HTML
If a client wants to add their tracking to the Read More button, this can be done but will only apply to the IQ Engage page and not the homepage widget.
To do this, edit the post and scroll to the bottom. In the box labelled "Read More Button", you can add custom HTML in the Tracking HTML box, just make sure you're changing the field to view the source if you have any issues.
Access via Token
Sponsored Blogs can be viewed anonymously without being logged in using an access token.
You can view the token on the Primary Details tab at the bottom in the section Page Access Token. Here you can regenerate the token (this'll removed access for anyone who has been sent a link with the old token) and generate a link with the token included.
You can also grab the link with the token added in the Sponsored Blog list (Admin > Content > Sponsored Blog) by clicking the Sharing link which'll display a popup with the link in it.
Sharing link not showing?
If the Sharing link isn't showing in the Sponsored Blog list, you'll need to re-save the blog post for it to appear.
Adding a User Token (UT)
Currently the system does not record who viewed a sponsored blog. The digital team are trying a method to do this by adding a UT along with the access token and using Google Analytics.
Setting the Domain(s)
Depending on the regional platform you are on, you may also need to set the domain the post will be visible on, you can do this by editing the domain settings.