Creating Whitepapers & Blogs
Whitepapers and Blogs are different types of Article. They are different types of content which can be added to the website other than videos.
Both are all created in the same way, but the way they are shown will depend on the channel they are added to. For how to display any Whitepapers or Blogs on a channel, please refer to the Whitepapers & Blogs content curation section in the channel guides.
Instructions
First you need to create an Article; go to Admin > Content > Add Content > Article, this will load the article creation form.
Composing your content
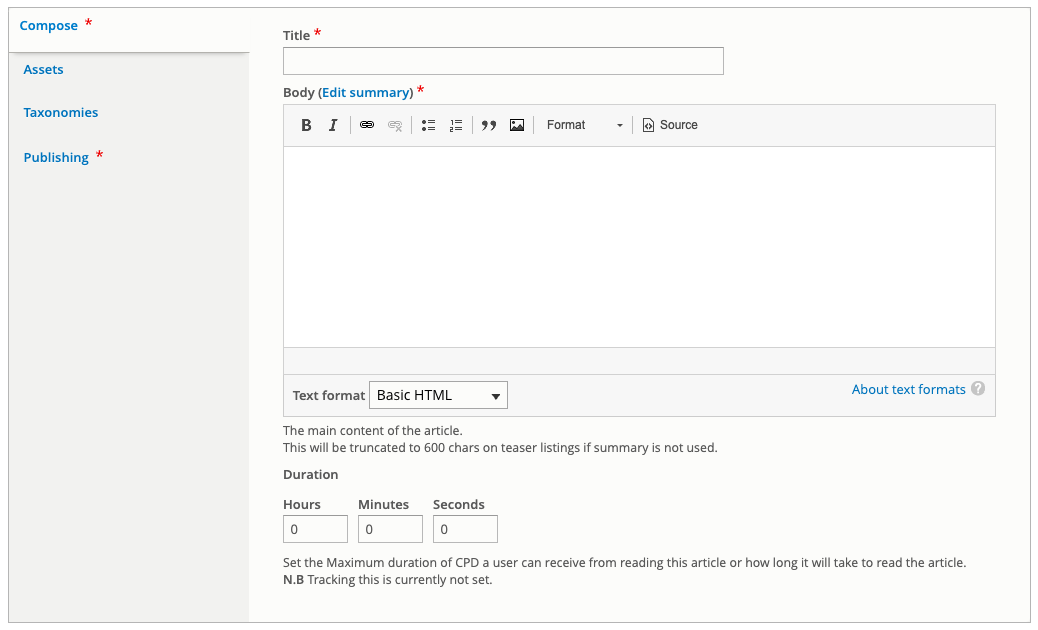
In the Compose tab you want to give your Whitepaper / Blog a Title, make sure it's descriptive of the content.
Staying in the Compose tab, you'll add the content in the Body field, for a Blog this'll be the main content, for a Whitepaper, it could be a short summary. If this is a Blog, you'll also want to Edit the summary as this is what will be shown on the grid or list layouts; this also applies to Whitepapers if you need to display a different summary on a grid or list layout.
Adding assets (whitepapers only)
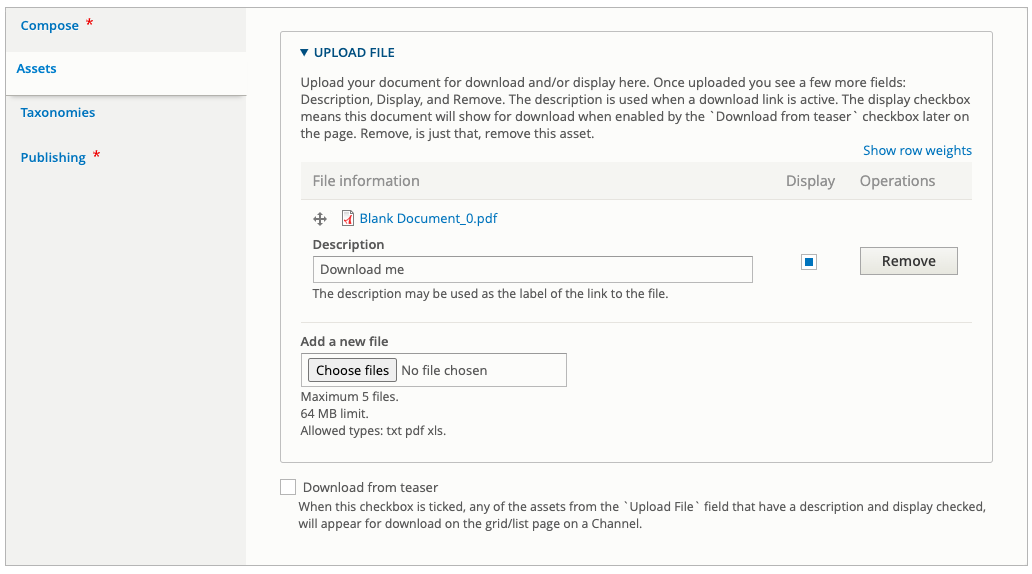
Now change to the Assets tab, this is only really for Whitepapers. Here you'll be able to upload up to five files that users will be able to download depending on how you set them up.
Once you've uploaded a file you'll see the option to give it a description and tick a checkbox to either display it or not. The description is what is shown as the download text if you tick the checkbox to display it. The display checkbox sets whether the file is visible for download or not.
When a file is made available to download, the download link is shown on the grid or list page. Otherwise the file is embedded on the page once you visit the main article page. If you attach multiple assets, they'll all show on the main article page.
Adding tags
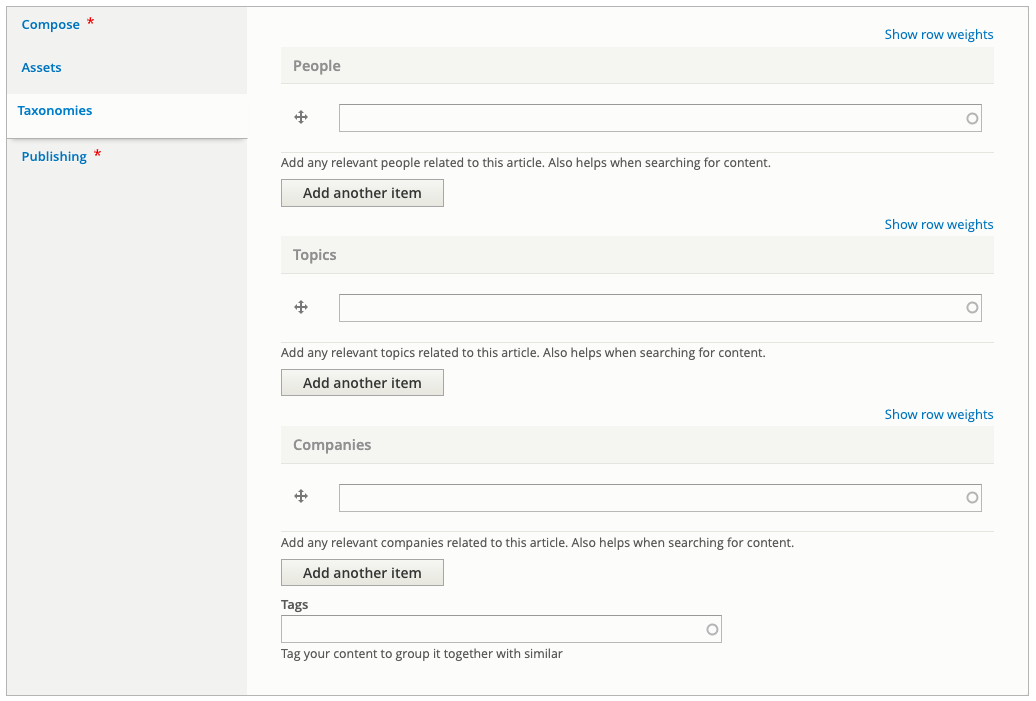
The next tab to complete is the Taxonomies tab. Here you complete all the taxonomies that are relevant for this article.
Completing the publishing information
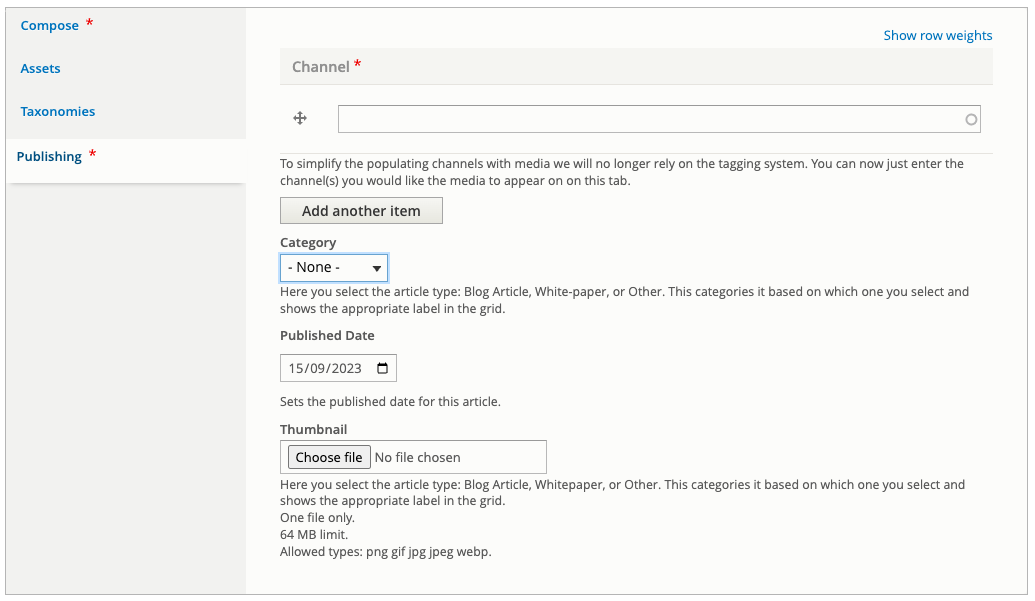
The final tab you need to complete is the Publishing tab.
You must select at least one Channel this article belongs to, but select any you need it to show on.
Next the Category, this assigns it as a Whitepaper, a Blog, or Other. This only really affects the label that is shown when articles are displayed in grid format.
The Published Date appears on the frontend in either the grid or list view. It is meant to represent when it was added/created, but it can also be used to order the articles.
The Thumbnail should be added to complete the article, especially as it will be shown in the grid or list layouts where articles are displayed.
Publishing category
At the moment the publishing category field only adds a visual label on the frontend. This means blogs and whitepapers will sit on the same page if a channel has both belonging to it.
The last thing to do before saving your article is to tick the checkbox at the bottom of the page if you'd like the article to be published straight away, or not if you don't.
Adding a quiz
US ONLY
Articles can have a quiz attached making them eligible for accreditation. This works in the same way as attaching a quiz to a video record.
Important! the only difference between adding a quiz to an article vs a video record is you need to select an additional rule to give the user 50 minutes as articles don't automatically give the user a duration watched like for a video.
You can follow this guide to add a quiz to an article: Adding a quiz to a video record.