Looker Studio Reports Self Service
This guide provides step-by-step instructions for managing company exclusions, renaming companies, and downloading GDS reports through the Retool app.
By following these instructions, you will be able to exclude or rename companies globally or at the owner level, mark reports as “Approved”, and download approved PDF reports.
Company Reviews
Global Exclusions & Renaming
To exclude companies globally (so they don’t appear in any reports for the selected region) or to rename a company, follow these steps:
- Navigate to the “Company Parent & Exclusions” tab and ensure you’ve selected the correct region.
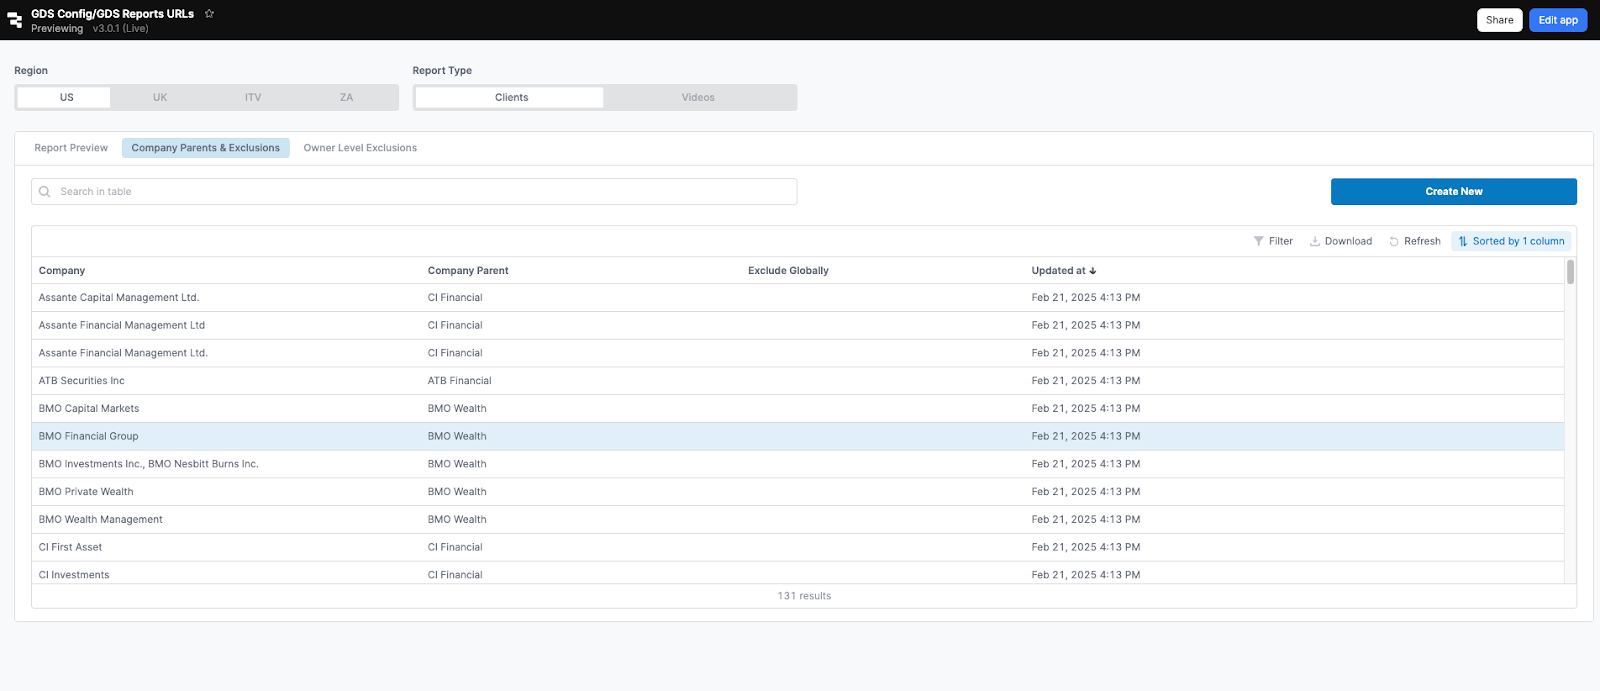
- You can either:
- (A) Use the search bar to find a company in the existing list, select the company record, and click “Edit”.
- (B) Or click “Create New” if you can’t find the company you’re looking for.

In both cases, a window will open allowing you to edit the record as follows:
- Company: The current company name.
- Company Parent: If you want to rename the company.
- Exclude Globally: If you want to exclude this company from all region reports.
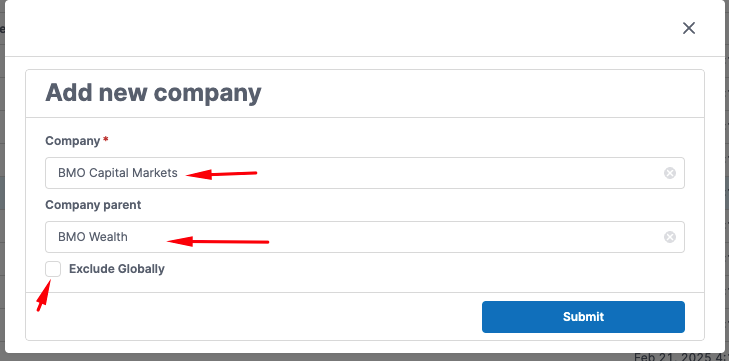
Once you’re done, click “Submit.” The changes will go live immediately.
Owner Level Exclusions
Existing Reports (Applies to Current & Future Reports)
To exclude companies from an existing report, follow these steps:
- Go to the “Report Preview” tab and ensure the correct region is selected.
- Select the report, scroll down to the “Top Companies” section, and uncheck the companies you want to exclude.
- Click “Save.” The changes will be applied immediately and will affect all future reports for this owner.
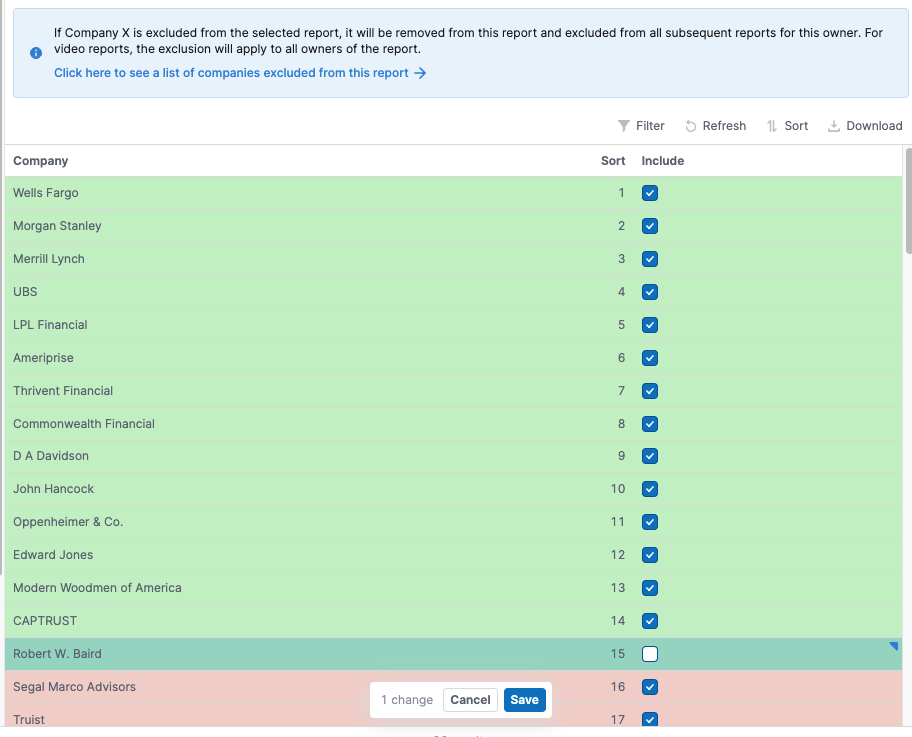
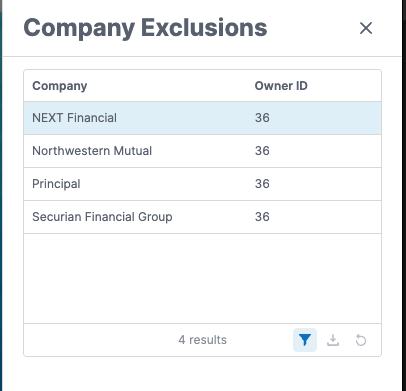
To view the current exclusions list for the report owners, click the link above the “Top Companies” table. A table like this will appear:
Non-Existing Reports (Applies to Future Reports Only)
To exclude companies for a specific owner/client who hasn’t produced reports yet, follow these steps:
- Go to the “Owner Level Exclusions” tab and ensure the correct region is selected.
- Use the search bar to find the owner, select their record, and click “Edit”.

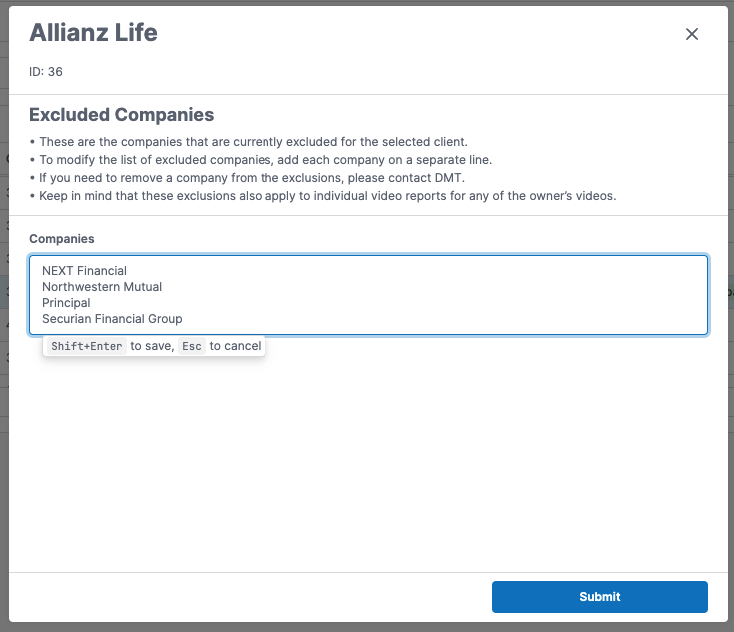
A window will open where you can edit the exclusion list for this owner. Enter each company in the “Companies” text box, with one company per line. Once you click “Submit”, the changes will be applied and visible immediately.
PDF Downloads
The report must be reviewed and approved by the relevant team before it can be downloaded. Follow these steps for a smooth and timely report delivery:
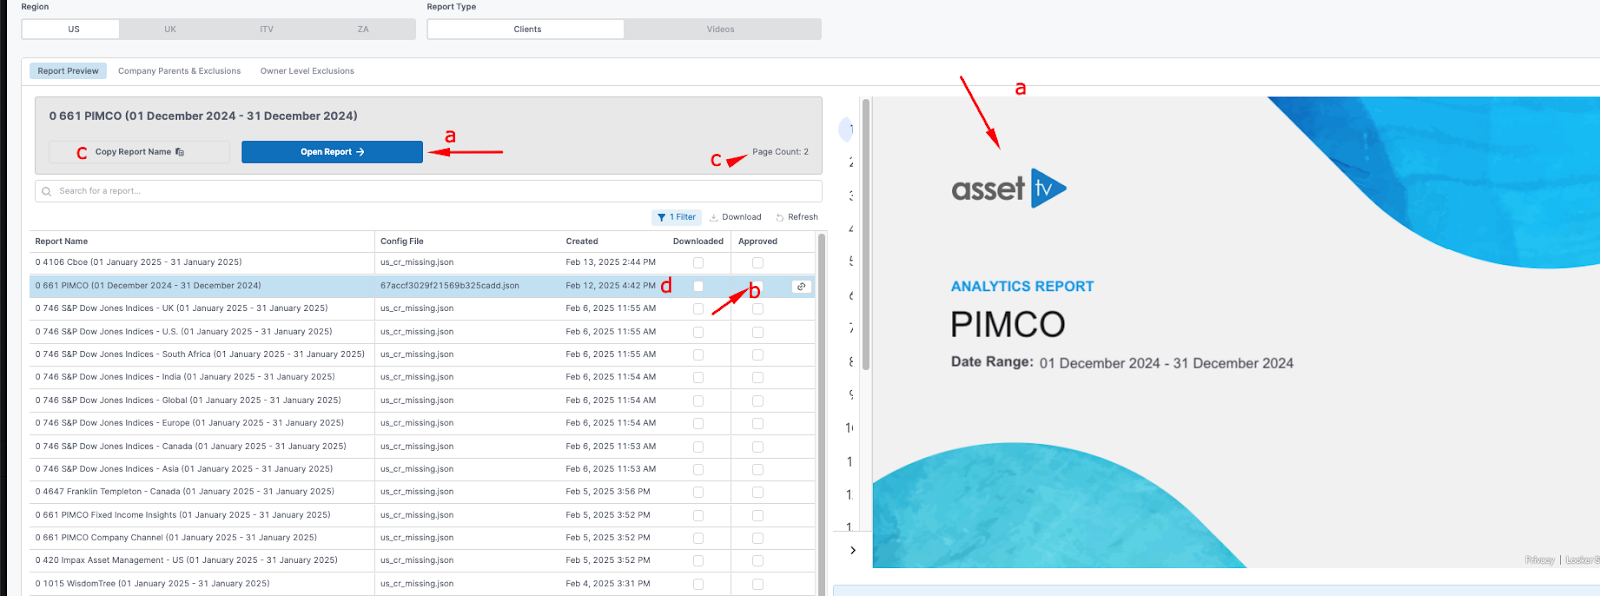
- (A) Select the report from the list and either review the embedded report iFrame or click the “Open Report” link.
- (B) If the company list needs updating, refer to the “Owner Level Exclusions” section. Once you’re satisfied, check the “Approved” checkbox and click “Save”.
- (C) To download the report, open it (see step 1), note the page count for multi-page client reports, and then:
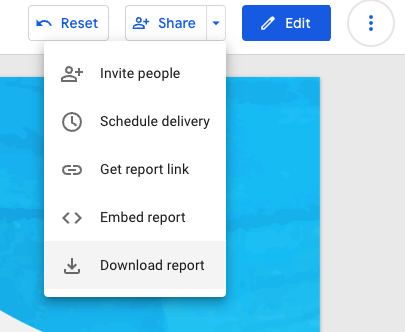
- From the dropdown menu next to the “Share” icon, select “Download Report”.
- Next, select the report pages you wish to download. Confirm with your team which pages need to be downloaded, and refer to previous reports for guidance. If unsure, check with DMT. Typically, you’ll need to download all pages that are not marked as “Optional,” along with the “Video (Views) P1-Pn” and “Video (Date) P1-Pn” pages. For example, for a US report with a page count of 2, the pages to download will be:
- Cover
- Insights
- Videos (Views) P1
- Videos (Views) P2
- Videos (Date) P1
- Videos (Date) P2
- Email Promotions (Date)
- Email Promotions (Video)
- Video Landscape
- Next, click “Download”. You can use the report identifier (via the “Copy Report Name” button, as shown in the screenshot below) to rename the report either during or after the download.
- From the dropdown menu next to the “Share” icon, select “Download Report”.
- (D) After downloading, check the “Downloaded” checkbox and click “Save”.
Congratulations! You have successfully downloaded the PDF!
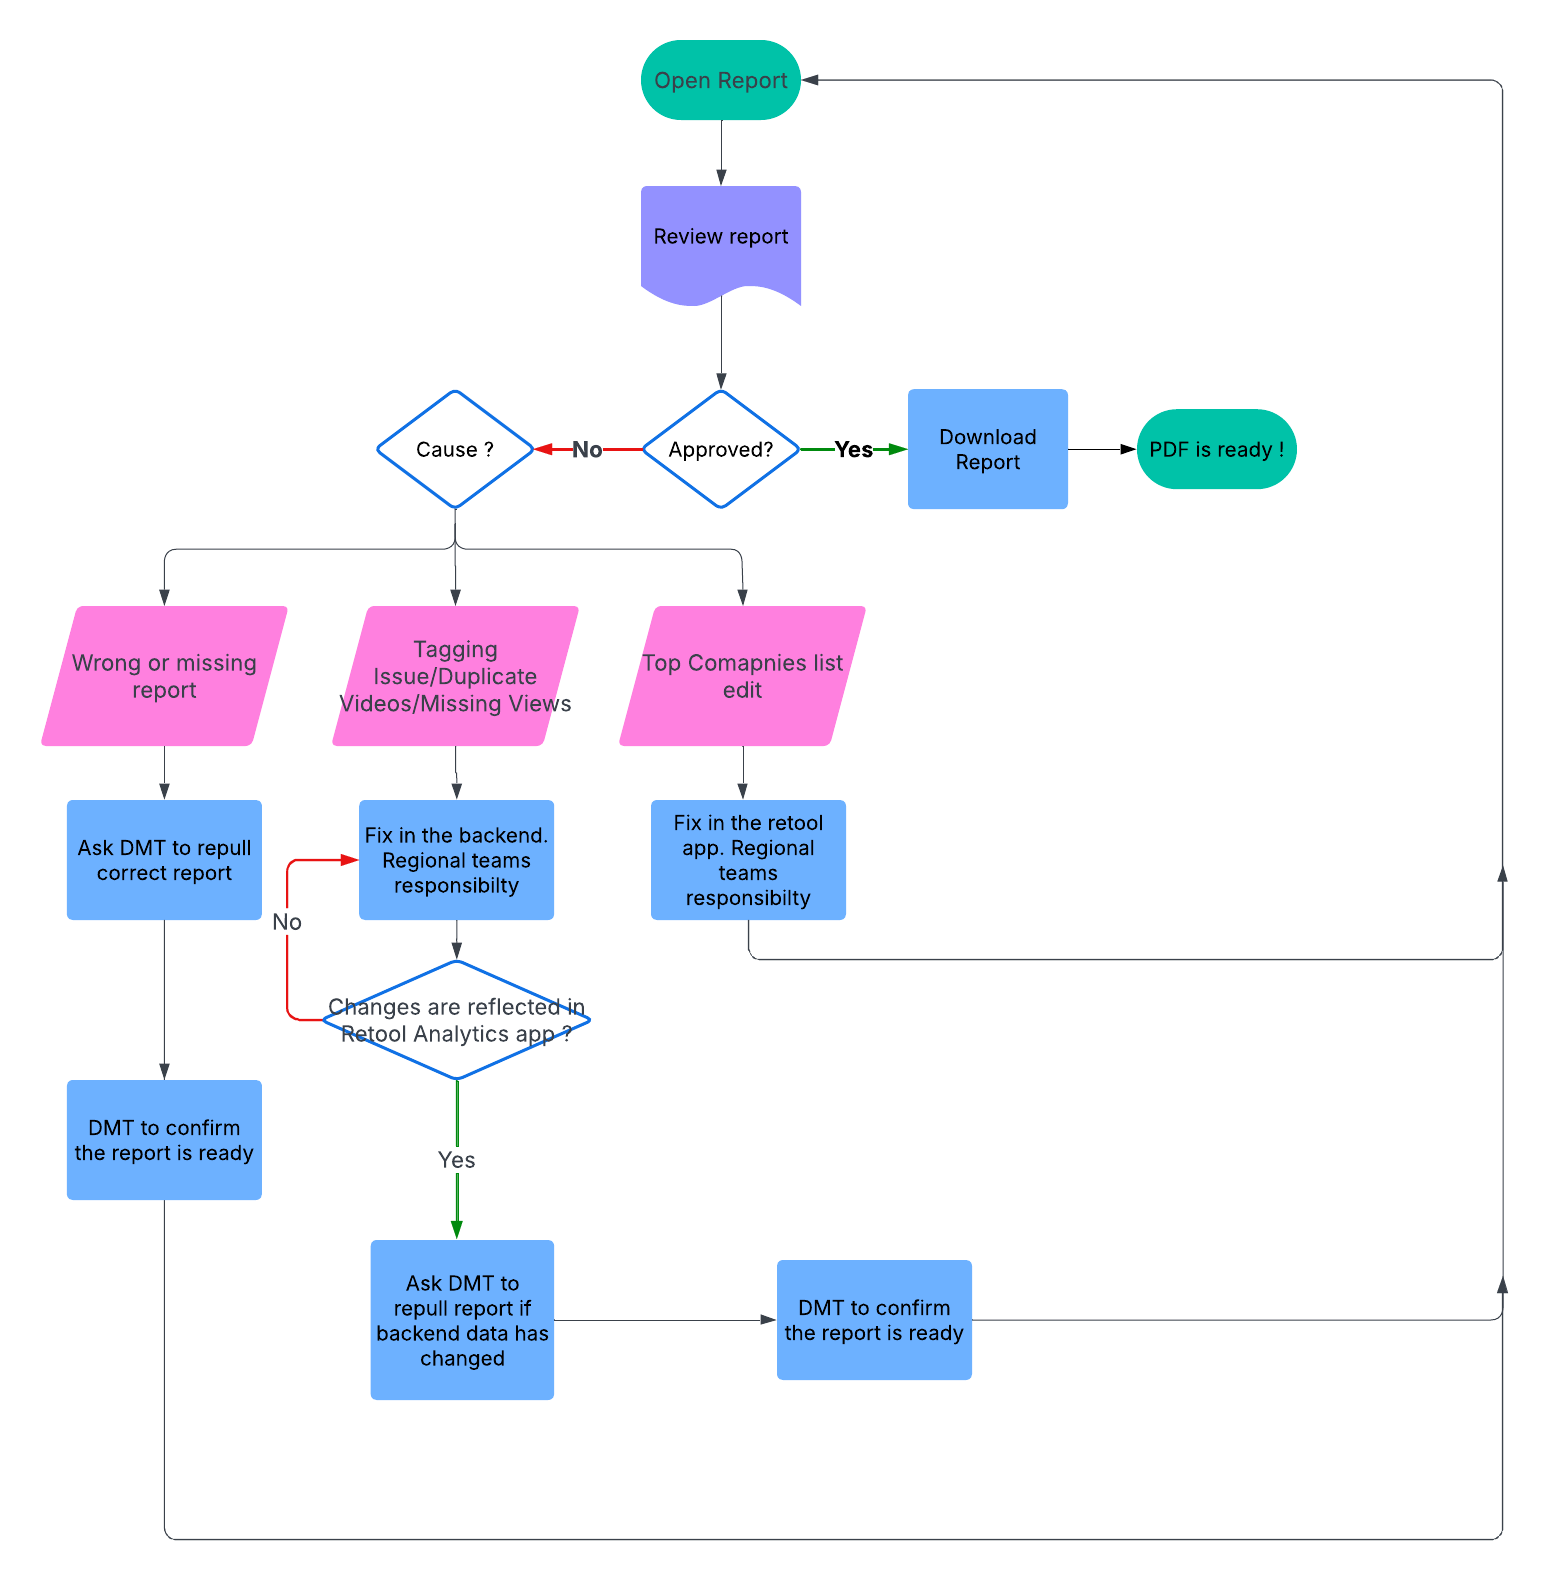
GDS PDFs Flowchart